Are you ready to seal your painted rocks for a lasting finish? Look no further! I’ve got some insights on sealers, from sprays to resins. I also included some helpful tricks to avoid smudging and other pro tips. So let’s dive in!

~This post contains affiliate links.
Sealing Painted Rocks
Sealing and protecting painted rocks is a great way to ensure their durability and longevity, especially if you plan to place them outdoors or handle them frequently. While the process varies depending on the type of sealer and what you want to achieve, it all boils down to the basic steps.
Steps in Sealing Painted Rocks
- Gather your supplies: You’ll need painted rocks, a sealer(which type?, we will discuss later), and an applicator (eg. brush, depending on the sealer type). You may also need rags, gloves, and a well-ventilated area; again, depending on the sealant type.
- Ensure that the paint on your rocks is completely dry, clean, and free from any dirt or debris.
- Prepare your workspace: You may need to lay down newspaper or a drop cloth to protect your work surface from any sealer drips or spills.
- Apply the sealer: This will vary greatly depending on the sealer used. All of which, I will discuss in more detail below.
- Let it dry and cure: Allow the sealer to dry completely according to the instructions on the sealer’s label. This may take anywhere from a few hours to a few days.
*Always read and follow the instructions provided by the specific sealer you choose.
Choosing the Right Sealer for Painted Rocks
When it comes to sealing your painted rocks, there are a few different options you can choose from. The main types of sealants are spray, brush-on, and pour-on sealers.
Spray Sealers for Painted Rocks
When it comes to sealing your painted rocks, spray sealers are a pretty popular choice. They’re super simple to use – you just grab the aerosol can and spray it onto the painted rock.
Pros
Now, let’s talk pros, shall we? One major plus is that you can seal a bunch of rocks at once with these spray sealers. No need to fuss with brushes or spend time cleaning them afterward. Plus, they dry pretty fast, so you can move on to the next step of your project in no time. They also come in matte, gloss, or satin finish.
Cons
But here’s the deal: when using spray sealers, you have to do it outside or in a very well-ventilated area. Depending on the product instruction, you might also need mask and gloves. You don’t want to be breathing in those fumes, right?
Tips
It’s a good idea to protect your workspace by using old rags or paper to avoid any overspray or staining.
Don’t spray when it’s windy! It’s pretty obvious why, right? You don’t want the wind blowing the sealer all over the place.
Don’t forget to read the instructions on the can. They’ll give you the lowdown on how to use it safely and get the best results.

Brush-On Sealers for Painted Rocks
Brush-on sealers, as the name suggests, are applied using a brush. They’re pretty nifty when sealing small painted surfaces such as stones.
To use it, you brush it into the stone. Let it dry.
Pros
One of the things I love about brush-on sealers is that they don’t require any fancy setup (unlike other types of sealer, which I will discuss later). All you need is a brush! Super convenient, right? For this reason, I mostly use brush-on sealers.
Another neat thing about brush-on sealer is that you don’t waste any of it, unlike when spraying or pouring. It’s also perfect if you’re working with just a few rocks at a time. They also come in different finishes too(matte, gloss, and satin).
Cons
Now, let’s talk about some disadvantages. Sometimes, applying brush-on sealers can result in an uneven coat or leave brush lines on the painted rock surface. Not ideal. They could also take a bit longer to dry compared to other sealers.
Depending on the product instruction, you might also need mask and gloves.
Plus, if you’re working on lots of rocks, it can be a bit more time-consuming and require more effort than spray sealers. And my least favorite part, you’ll need to clean the brush after each use.
Tips
If you want to avoid brush marks, use a sponge rather than a regular brush. It helps give an even, smooth finish.
And if you want to reuse your brush, just wash it with soap and water right before it dries.
If you just want to try sealing 1 stone, you can use clear nail polish(if you happen to have). Which I wrote an entire post about.
Pour-On Sealers or Resin for Painted Rocks
If you’re looking to give your painted rocks a seriously shiny and long-lasting finish, pour-on sealers are the way to go! They’re also called resin or clear epoxy.
Basically, you mix a couple of things together and pour it over your rock. It creates this thick, see-through layer that really makes the colors pop and adds some depth to your design. Plus, these sealers can be super tough and protect your rocks from the sun, water, and everyday wear and tear.
Pros
On the upside, you get this amazing glossy finish that gives your rocks a very polished look. This is perfect for those who sell or gift their special painted rocks.
Cons
But, there are a few things to keep in mind. You’ll need to measure and mix two components, which can be a bit fiddly. You might also need to use a brush or stick to apply it. And it’s a good idea to cover your work area with some plastic because things can get messy. Depending on the product instruction, you might also need mask and gloves.
These sealers make thicker layers and can take longer(a few days) to fully cure, so you’ll need to be very patient. They can crack if not cured properly.
Tip
If you don’t have time(or patience) to wait for days to cure your rocks, you can try UV Resin Kits which come with a curing light. They can be more pricey but cure so much faster (I mean in minutes, seriously!).
How Do You Seal Painted Rocks Without Smudging
When using some types of acrylic paints, you may encounter the frustrating issue of smudging. This is especially true when you incorporate acrylic pens or markers in your painted rocks. Don’t despair! Here are a few ways to seal these painted rocks without smudging.
- Let the design completely dry before sealing.
It can take days to completely dry, depending on the sealer. Again patience is key! - Apply a thin initial coat.
Mist or dab a light layer of sealer on the painted rock. This will protect the design without soaking and smudging. Let it dry before applying a thicker layer. - Use Mod Podge.
Apply a thin coat of Mod Podge to the painted rock before sealing it. Mod Podge acts as a protective barrier and helps prevent bleeding. Let it completely dry then use a sealant of your choice. This will work even with Sharpies.

More Tips for Sealing Painted Rocks:
- Let them dry completely before sealing. It’s really important!
- Take pictures before sealing to avoid glare.
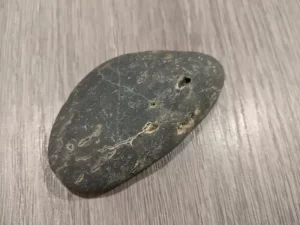
- Spray water on the rocks to have an idea of how they’ll look when sealed. You will see this in the picture above.
- Use sealers that are safe and won’t turn yellow.
- If you’re using rocks as outdoor decor, choose a sealer with UV protection.
- Wear gloves or a mask if needed and work in a well-ventilated area.
- Always read the product label before using it.
Now, it’s time to level up your painted rock game and give them the protection they need. Grab your sealer of choice, and let’s make sure those rocks stay vibrant and stunning for the long haul!