Creating a beautiful Northern Lights painting on a rock can be such a fun and creative project. I’ll be your guide through this artistic journey, and guess what? I’ve got it all covered! I’ve created a full video where you can see the entire process, and for those who like to take it step by step, I’ve got a written instruction with pictures (because who doesn’t love visuals?).
You won’t need anything fancy – just some basic stuff, your imagination, and a strong desire to capture the magic of the Northern Lights on your chosen surface, be it a rock, a canvas, or whatever you fancy. So, let’s dive into this artistic adventure together and light up your chosen canvas with those gorgeous Aurora Borealis. Are you ready for some creative fun?
.
Full Video: Northern Lights Rock Painting
In this video, I’ll show the entire process of creating a stunning Northern Lights masterpiece. So, grab your popcorn, sit back, and let’s bring those beautiful lights to life on your canvas. Enjoy the show!”
Materials for Northern Lights Rock Painting
Before we dive in, just make sure your art supplies are easy to grab. We’re gonna work with acrylics, and we might need to mix colors in a jiffy. Ready to go? Let’s do this!
~This post contains affiliate links.
- Surface to paint(I used a small rock that I primed with white acrylic paint, mini canvas works great too)
- Acrylic paints (blue, white, and black)
- Small or medium brush (I used a flat brush, but any basic brush will work if you don’t have flat)
- Jar of water or a fancy paint brush cleaner
- Rag or paper towel
- Clear coat
- Stick or brush (optional, for splattering)
Tips
- Don’t stress over the details; use what you have.
- New to rock painting? Check out my Rock Painting Beginners Guide.
Step by Step Instructions: Northern Lights Painting
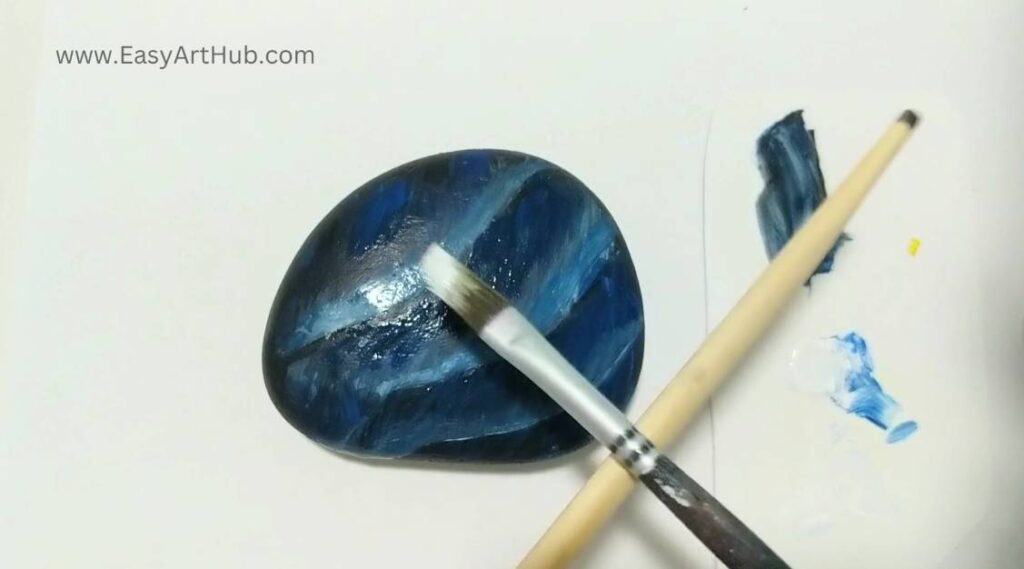
Step 1: Dark Sky Background
Let’s set the stage for our night sky by creating a dark night sky backdrop on the rock.

Place a few dabs of blue directly onto the rock’s surface. Next to these blue dabs, add some black paint.
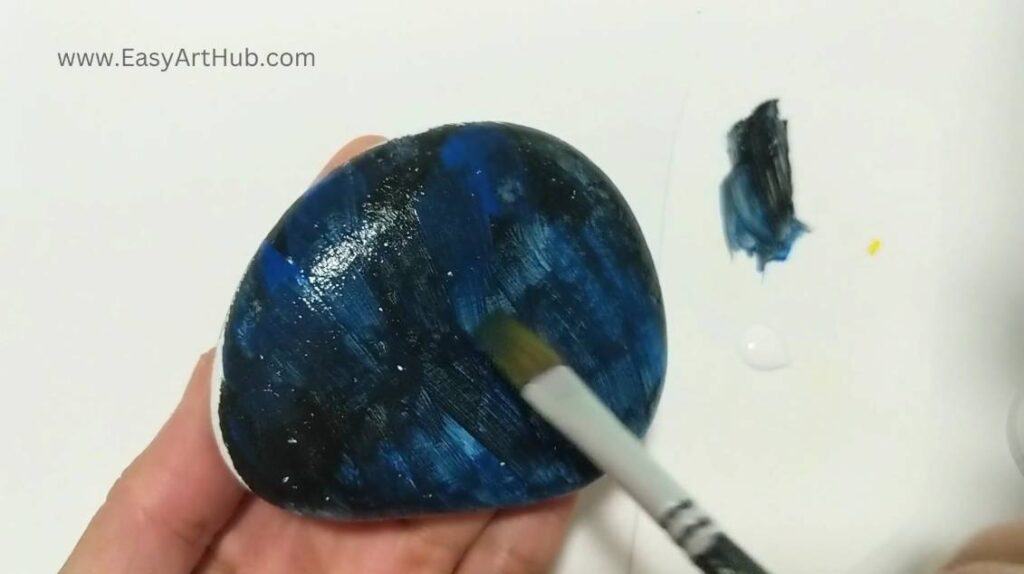
Use your brush to spread and blend the paint on the rock, creating a dark blue background with occasional spots of both blue and black. This will make the night sky more interesting. Allow the paint to dry. Rinse and clean your brush.
Step 2: Northern Lights
Now, it’s time to paint those mesmerizing Northern Lights that will dance across our dark sky. To do this we’ll create a subtle light blue gradient. This is where our flat brush will come very handy.
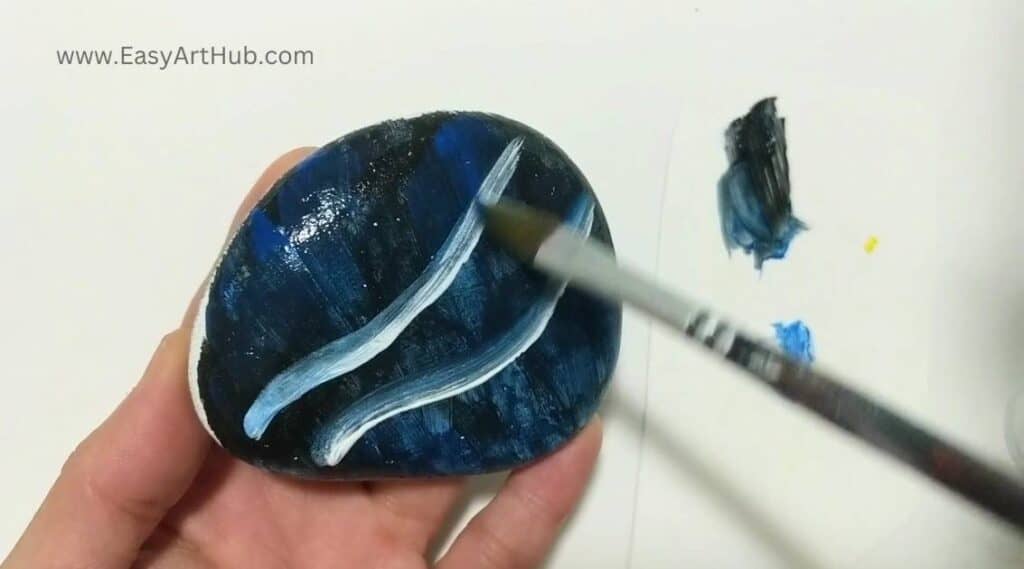
Create a light blue color by mixing white paint with a touch of blue. Paint a few diagonal wavy lines across the rock. These lines will serve as the foundation for the Northern Lights and provide contrast for the trees you’ll add later.
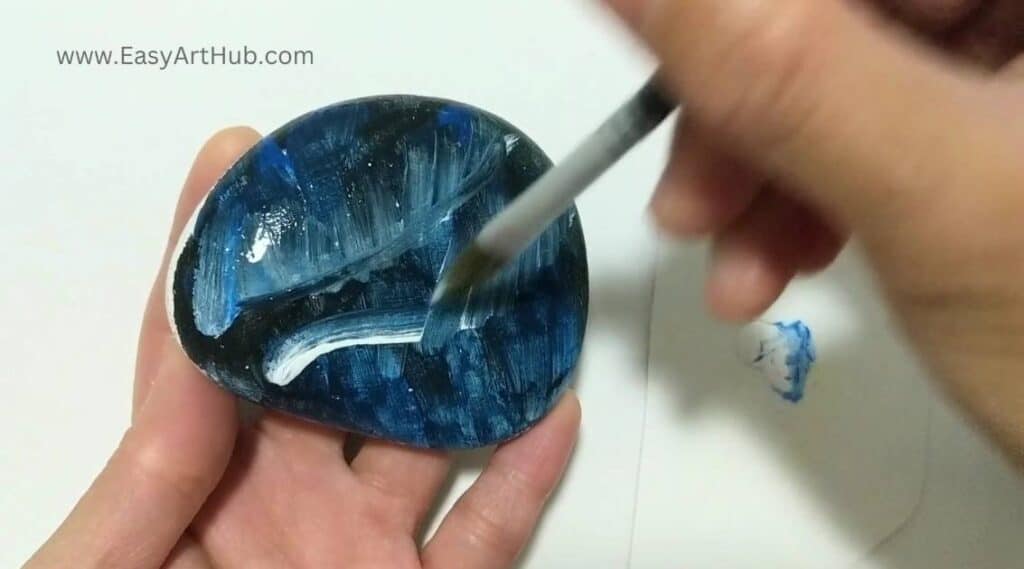
While the paint is still wet, gently brush each line upwards in one direction to create a gradient effect. Allow the paint to dry.
Pro tip: Add enough waves of lights, so you don’t need to do Step 6.
Step 3: Define the Lights
In this step, we’ll be adding depth and character to our Northern Lights, giving them a little extra definition. Continuing from our previous step, we’ll now enhance the lights by darkening the space between them, which will add depth and contrast to our Northern Lights.
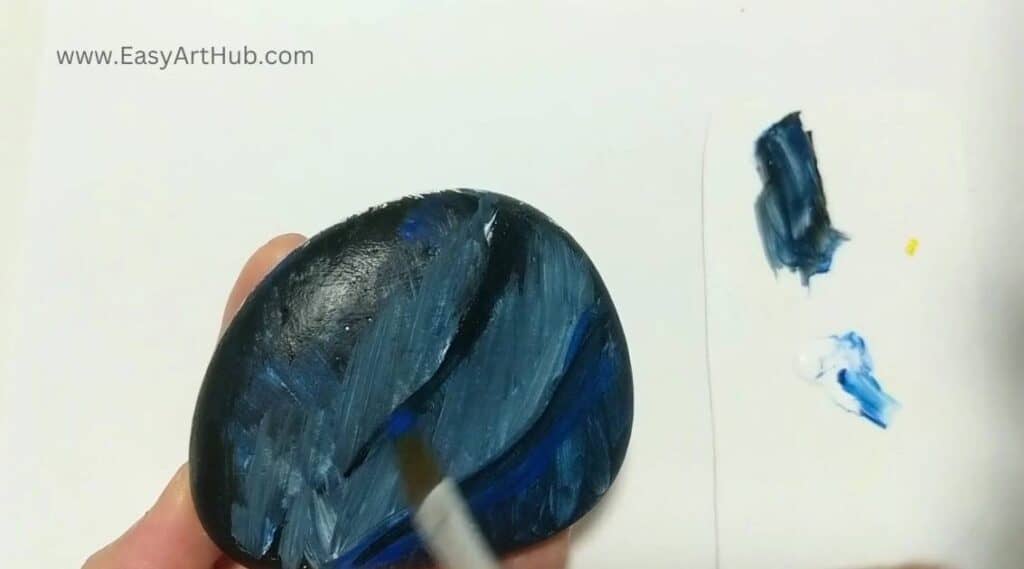
Using the same small flat brush, add thin black lines between the wavy lights. On top of the black lines, apply another layer of blue lines following the direction of the waves.
Blend the blue paint toward the white lights, maintaining the flow of the waves.
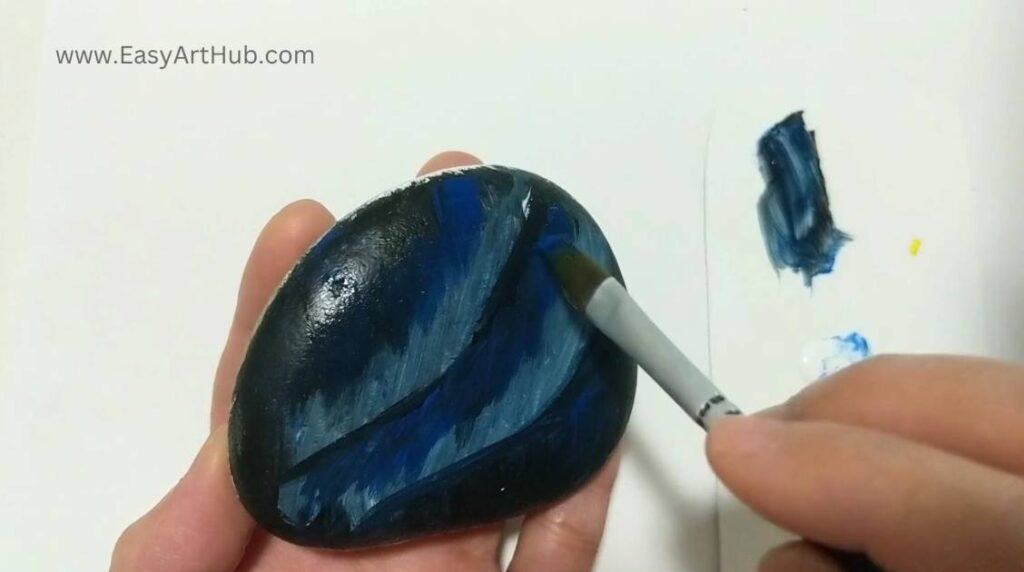
Step 4: Make Lights Brighter
To make those lights pop, we’re going to add a little more brightness and vibrancy.
Add more white paint to the white areas of the Northern Lights. Blend the white upwards to make them appear brighter and more vibrant.
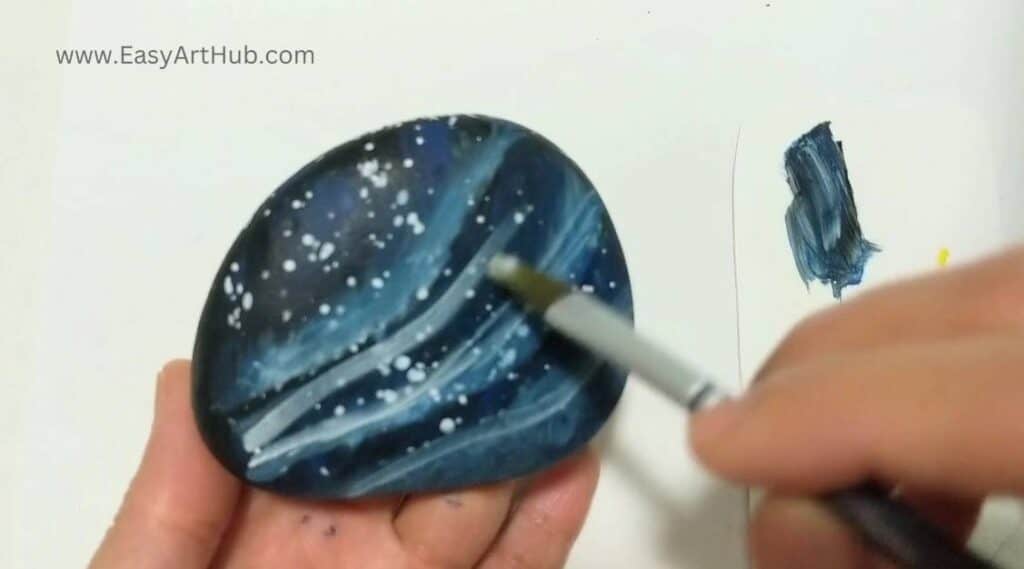
Step 5: Add the Stars
Time to sprinkle some starry magic across our canvas by creating a starry night effect.
To create stars, dilute some white paint with a bit of water on your brush. Hold a stick or another brush, and tap it gently against the brush with the diluted white paint to create splatters of white paint across the dark sky. Or just flicker your fingers to tap. This will simulate the appearance of stars. Adjust the size and density of the stars by varying the distance between the brush and the rock, as well as the amount of paint on the brush.
Pro tip:
Practice on a piece of paper to see how big the splatters will be. Use an old toothbrush if you want to create smaller dots.
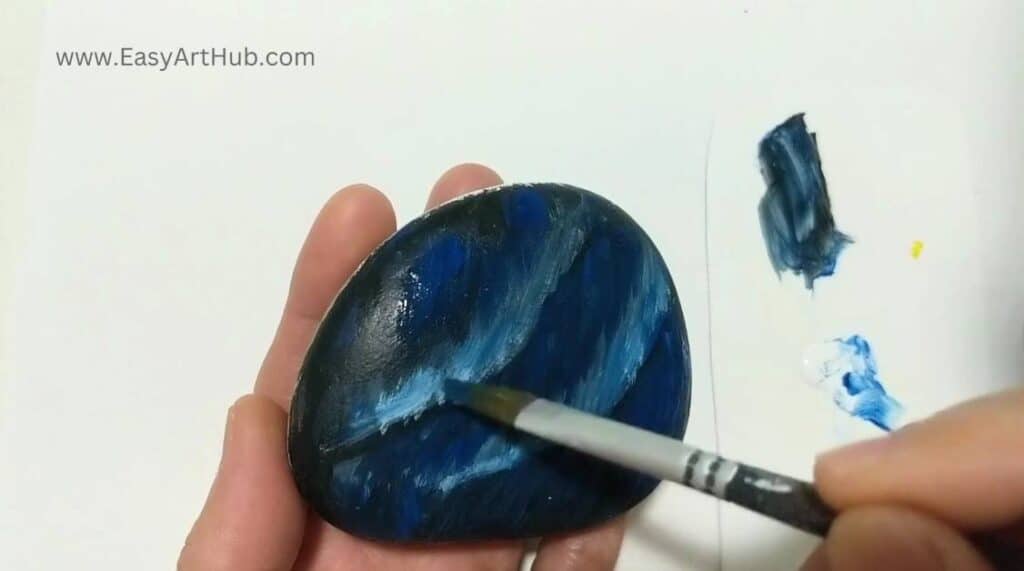
Step 6: Add More Lights
If you feel that there aren’t enough lights in your Northern Lights display, you can add more at this stage.
Concentrate on the lower part of the sky where you’ll later paint tree silhouettes. These lights will provide contrast and visibility for the trees. Allow the paint to dry completely. Rinse and wipe your brush clean.
Step 7: Paint the Trees
Let’s bring our scene to life by adding some pine trees to our picturesque night sky.
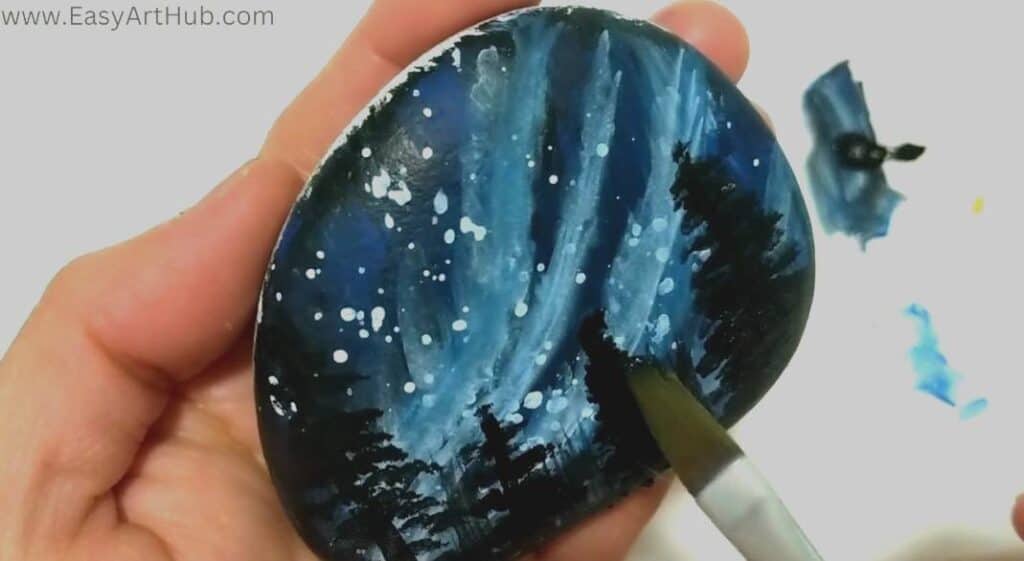
Use the tip of a flat brush to create a vertical line for the trunk of a pine tree on the rock. Dab the brush to create the foliage of the tree, working your way from the trunk outward. You can paint multiple pine trees across the rock, varying their heights and shapes for a realistic forest effect.
Allow the paint to dry completely (at least 24 hours) before Step 8.
Step 8: Seal your Masterpiece
To preserve your beautiful painting, seal it with a clear sealant or varnish, following the manufacturer’s instructions. This step will protect your artwork and give it a polished finish.
Allow the sealant to dry completely before displaying your masterpiece.
Your Northern Lights on a rock painting is now complete! Display your artwork with pride and enjoy the beauty of the natural phenomenon on your rock canvas.
Techniques Used in This Tutorial
Here’s a bunch of neat techniques I’ve used in this Northern Lights rock painting tutorial:
Blending: Mixing blue and black acrylic paints to create a dark, mysterious backdrop on the rock.
Gradient Painting: Creating a subtle light blue gradient for the Northern Lights using a mixture of white and blue paint.
Creating Contrast: Enhancing the Northern Lights by adding thin black lines between the lights and applying additional blue lines for depth and contrast.
Highlighting: Making the lights appear brighter and more vibrant by adding more white paint and blending it for increased brightness.
Splattering: Creating stars in the night sky by splattering white paint.
Dabbing: Using a flat brush to paint pine trees, creating trunks and foliage to bring the scene to life.
Thanks for joining me on this Northern Lights Rock Painting Tutorial. Until next time, happy painting and exploring the wonderful world of art.