With Halloween just around the corner, what better way to embrace the spooktastic vibes than by creating your very own Spooked Cat rock painting?
This step-by-step guide will walk you through the process. If you don’t like to read my ramblings (I understand), I have a full video tutorial at the end of this post.
Whether you’re a seasoned artist or a casual doodler, of crafting a bewitchingly beautiful masterpiece. Grab your art supplies, and let’s dive into the world of Halloween rock painting!
Materials You’ll Need:
Before we dive into the fun part, let’s make sure you’re armed with the right tools for the job:
~This post contains affiliate links
- Smooth rock
- Pencil or colored pencil *optional(use if you prefer to sketch first)
- Acrylic paints (black, blue, white, yellow, and red)
- Medium round brush
- Sponge (a strip of dish sponge, or makeup sponge) *optional
- Jar of water
- Rag or paper towel
- Blow dryer *optional (use if you are in a hurry)
*If this is your first rock project, check out my Rock Painting Beginners Guide. It includes more info on how to pick your materials and everything you need to know to start.
Step-by-Step Instructions:
1. Paint the Background Black
Start by creating the background for your painting. Use a sponge or a brush to apply a smooth black layer onto the rock. Proceed to the next step while the paint is still wet.
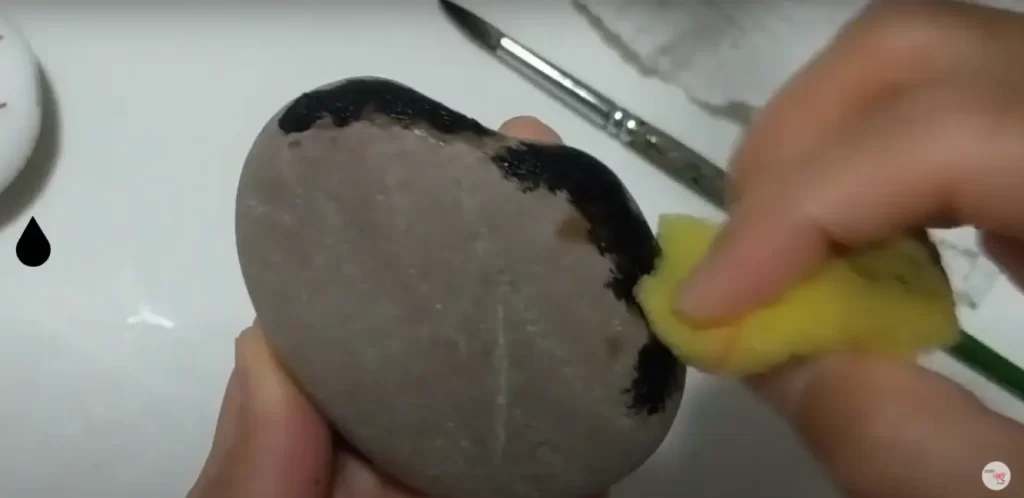
I only used a very thin layer of black paint here since my rock is already dark. It will get even darker after I apply the sealer (Step #9). I also didn’t paint the middle since it will be covered with white in Step #4.
I love using a sponge for the background because it creates a thin layer that dries faster. It also does leave any brush lines. Brush works just as well, but you will have to make sure to apply evenly.
2. Add Some Blue Spots
While the black paint is still wet, lightly dab some blue spots onto the rock. Let it dry before doing Step #3.
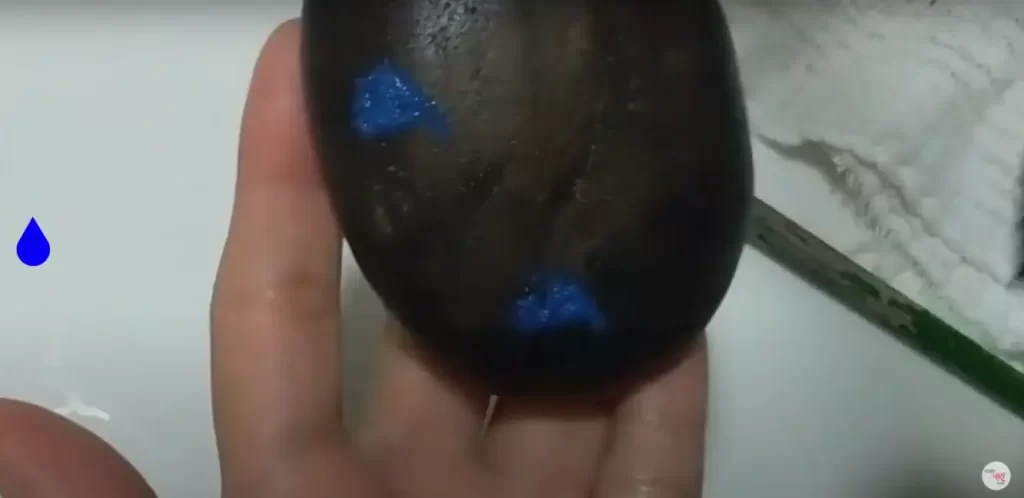
I used the same sponge, still with black paint, to add the blue. I partially blend them together by dabbing each spots for few times.
3. Draw a Circle in the Middle
With the background set, it’s time to draw the moon. You can use a pencil to lightly sketch or trace a coin or any circle in the center.
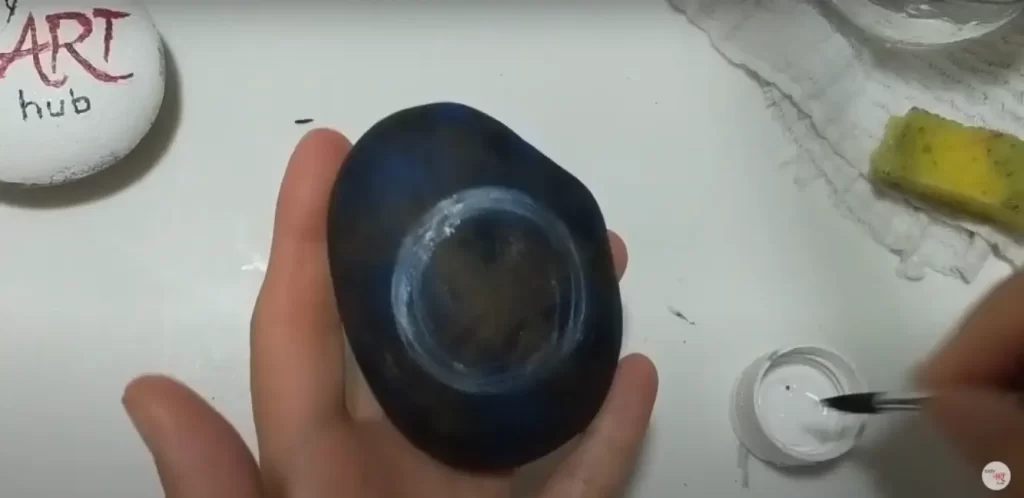
If you are comfortable using the brush, you can directly sketch the moon with it. Just load the pointy tip of the brush with white paint to create roughly sketch the full moon. You can see how I did this in the full video tutorial below.
No worries if your circle is not perfect, you can cover that later with black paint. This is why I love acrylic paint.
4. Dab the Moon White
To give the moon some texture, use a sponge to gently dab white paint onto the circular area you’ve created. This will mimic the texture of the moon’s surface.
Allow the paint to dry thoroughly before starting the next step.

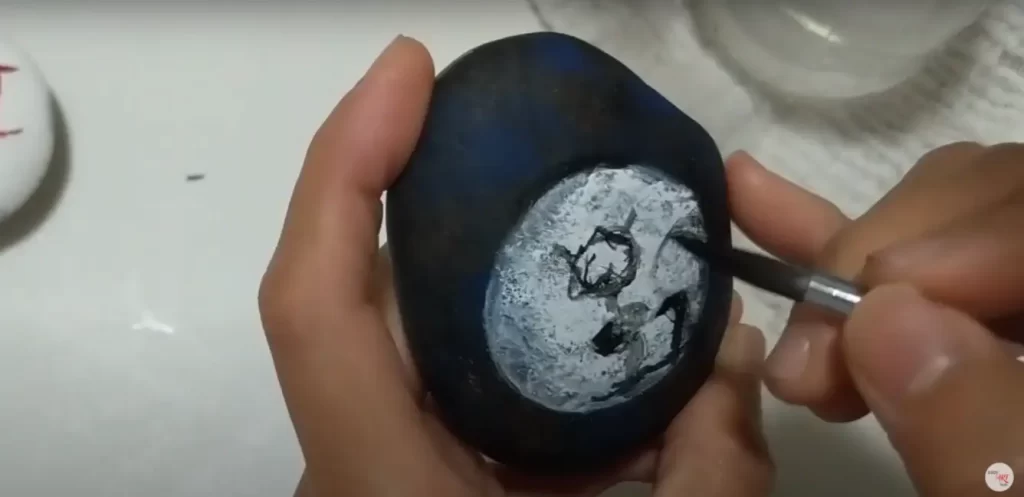
5. Sketch the Cat
Now comes the exciting part – sketching the cat. You can use the tip of your brush dipped in black paint or opt for a pencil if you’re more comfortable with that.
Lightly outline the cat’s shape, just like a stick figure. Don’t worry about the details yet, you just want to make sure that the cat is in the right position.
If you make a mistake, no worries. Just let it dry, apply some white paint, let it dry and try sketching again.
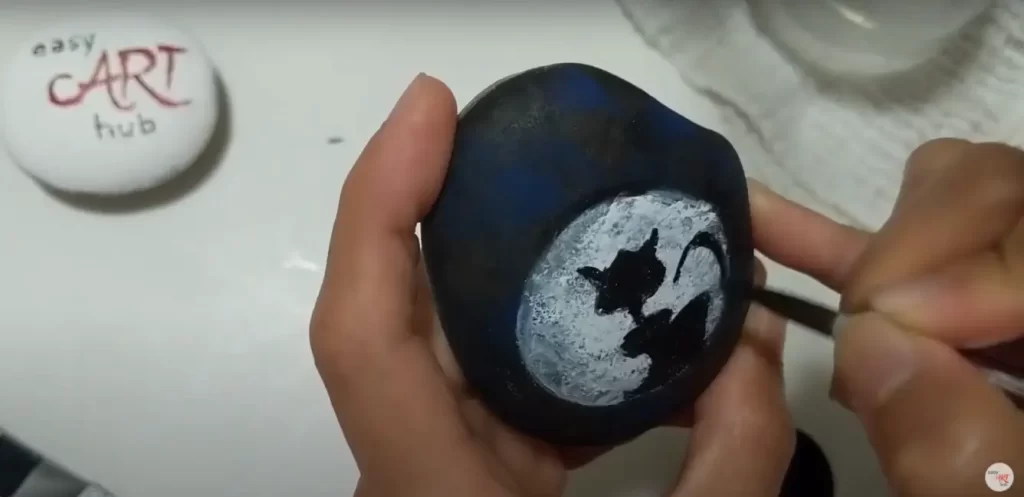
6. Paint the Cat Black
With the sketch in place, start filling in the cat’s silhouette with black paint. Use the same medium round brush for this step. To add character to the cat, add subtle strokes to mimic standing hairs of a cat.
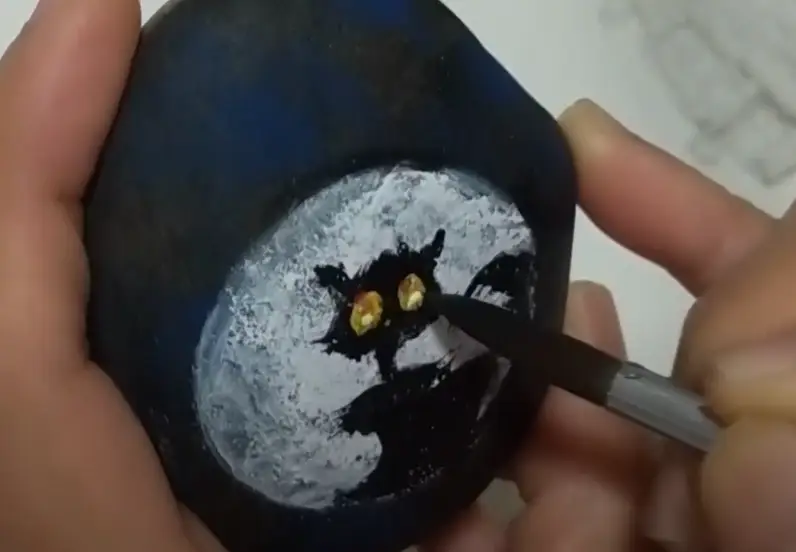
7. Paint the Eyes
Using yellow paint, create two oval shapes for the eyes. Add a dot of red into the top part of each eye the blend it with the yellow paint.
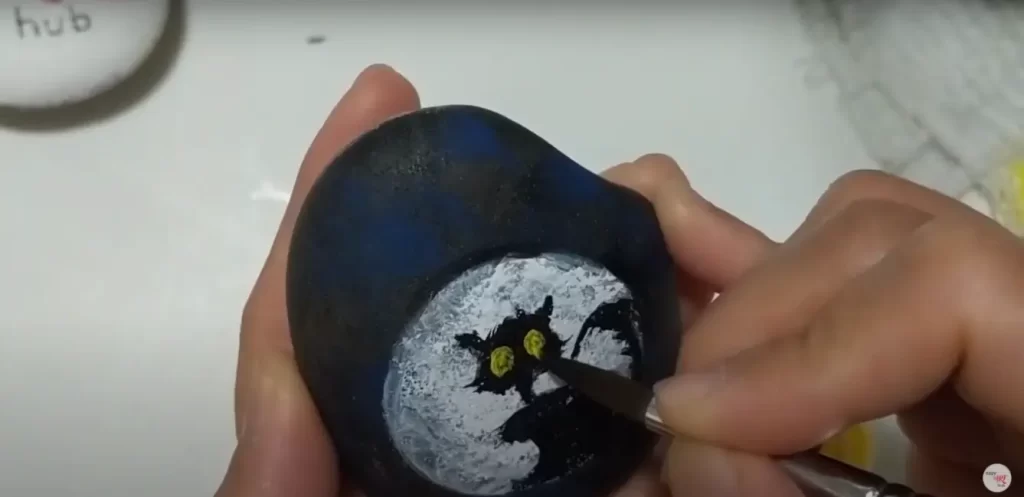
Add a tiny white dot at the bottom of each eye to make them appear shiny.
Add a dot of red into the top part of each eye. Slightly blend the red dot with the yellow paint. Let the paint dry before Step #8.
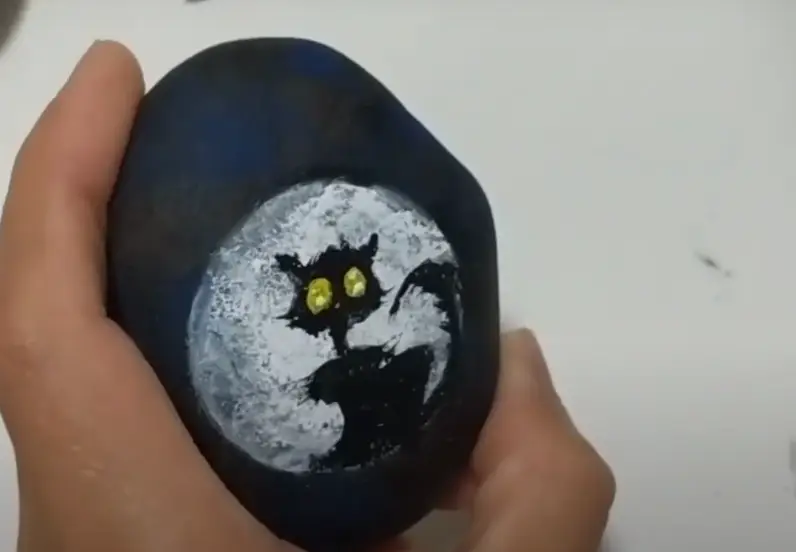
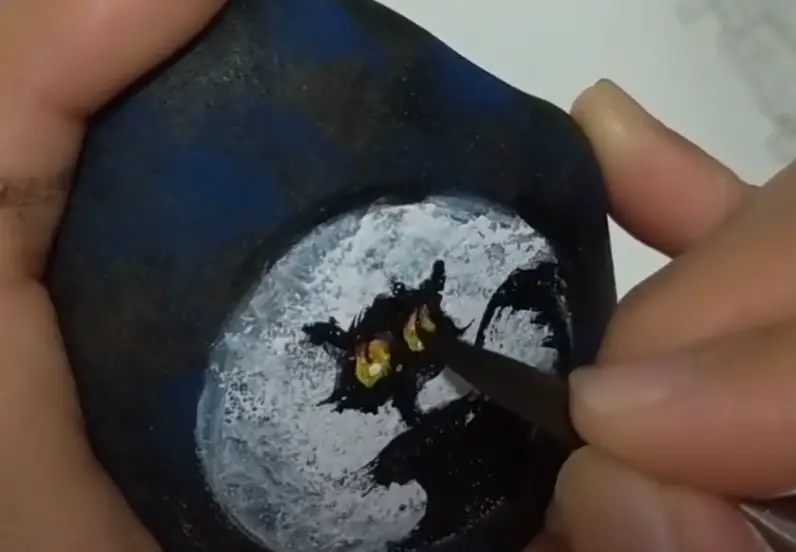
8. Add the Pupils
Our cat’s eyes will not be complete without the pupils. To do add it, dip the tip of the brush into a tiny amount of paint and use it to draw thin curved lines in the center of each eye.
Let the painting completely dry.
9. Apply the Seal
When the paint is completely dry. You can apply your seal of choice.
I usually wait at least 24 hours before I apply any sealant.
Note: The drying time will vary based from lots of factors (humidity, temperature, paint, etc), you may have to test what works for you.
Video Tutorial
As promised, here in my video tutorial.
Final Meowments:
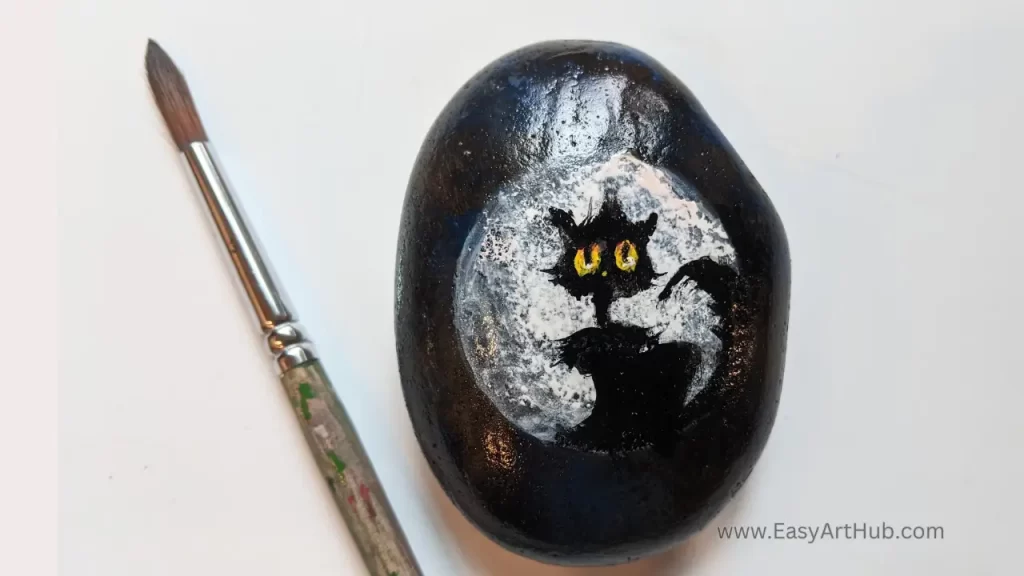
Give yourself a round of applause! You’ve just conjured up your very own Halloween Cat Rock painting. With a dash of creativity and a sprinkle of spookiness, you’ve turned an ordinary rock into a captivating piece of Halloween art. So go ahead, display it with pride, and let your friends and family marvel at your newfound artistic prowess. Now, who’s ready to rock some Halloween vibes?
If you want more Halloween Rock Painting Tutorial, check out my super duper easy Ghost and Jack-O-Lantern tutorial.