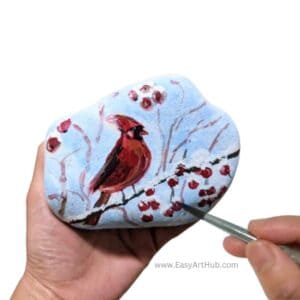
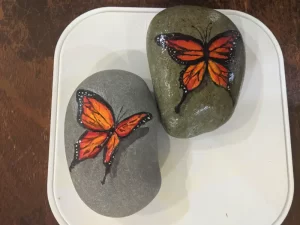
If you’re new to rock painting, creating an outline can be a challenge. No worries! I’ve got you covered with eleven simple ways to outline your designs on rocks, no drawing skills required.
To design rock paintings, techniques like stenciling, transferring, tracing, and stamping can be used by beginners. Other methods using decals, mod podge, or phone apps can also be employed to achieve the desired outline without needing much drawing skills.
~This post contains affiliate links.
11 Ways To Outline Design For Rock Painting
When you’re painting on rocks, it’s helpful to start by outlining the design. This helps you achieve the desired look, just like in any other painting surface.
In this blog post, we’ll explore nine different methods for outlining your rock painting design, so you can find the one that works best for you.
1. Using Stencils to Create an Outline
If you’re not yet confident in your drawing abilities, using stencils can be a great way to ensure a clean and consistent design. You can purchase stencils at most craft stores, or you can even make your own by printing out a design and cutting it out with a Exacto knife.
Once you have your stencil, simply hold it in place on top of your rock and paint over the cut-out areas. Then use a sponge to dab some paint over the design. Or use a brush, making sure to brush towards the middle to prevent the paint from seeping outside the cut-out area.

2. Transferring An Outline Using Transfer Paper
If you’re looking for a way to transfer/copy your design from a print-out onto your rock, you can do that using transfer paper. This method can be used in medium to large rocks.
Transfer paper comes in two types: waxed and unwaxed. Wax-free transfer paper, erasable lines (like a regular pencil/colored pencil) while waxed ones leaves dark black permanent lines(like a charcoal pencil). Unwaxed is recommended because it doesn’t leave smudges all over.
To use the transfer paper, simply place it (pigment-side facing down) on top of the rock. Then place the printout of the design on top of the transfer paper. To copy the design to the rock, use an inkless pen or dotting tool to trace over the printout.
3. DIY Transfer Paper For Rock Painting
If you don’t have transfer paper, you can make your own little transfer paper by shading a piece of tracing paper with a chalk/charcoal/graphite pencil. You can use these papers just like transfer papers.
Alternatively, you can easily create the same transfer effect by applying pigment at the back of the printout you will be using.
In the picture below, I used charcoal, regular pencil, and chalk to shade the back of each printout (with pictures printed in front). I then place them (shaded side facing down) on top of each rock, and then trace the design.
The result: Charcoal creates darker more visible lines but a messy background. The regular pencil creates lighter lines but no messy background. Using carbon vs graphite transfer paper will have similar results. Then the chalk creates visible, erasable lines.

4. Creating An Outline Using Tracing Paper
Another way to create an outline is by using tracing paper. Tracing paper is semi-transparent paper without any pigment like graphite or carbon. Alternatively, you can use wax/parchment/tissue paper, whichever you have.
To transfer a design onto a rock using tracing paper, trace the design from the paper, flip it over, position it on the rock, and trace it again. Then, you can paint the design with your desired colors.
5. Direct Tracing or Etching on Rock
Now if you don’t have any tracing or transfer paper, you can try direct tracing. It works if the rock has a thick primer or base paint.
To use this technique, simply place the cut-out design on top of the rock and trace over it with a pencil or pointy object. The pressure from the pencil will engrave the design onto the rock.
Depending on how much pressure you use while tracing, it may remove some of the base paint. Use lighter pressure if you want the primer of the base paint intact.
In the example below, I used a piece of paper (with a heart print) to create the outline. You will notice, some of the white paint got removed because I put too much pressure while tracing the heart. Which is fine, because it can easily be covered with paint anyway.

6. Using Stamps to Add Design to Rock Painting
Stamps are a fun and easy way to create repetitive designs on your rocks. You can purchase stamps at most craft stores, or even make your own using foam sheets and a craft knife. After you stamp your design, you can paint it to your heart’s desire.
In the picture below, I used a small stamp(kiss). Using big stamps on rocks will be harder since the surface is not level. To ensure complete coverage of the curved areas, you’ll need to move the rock gently from side to side.
Note: Stamp ink(alcohol-based) may bleed when sealant is applied.

7. Using Vinyl Decals To Add Words and Other Designs
If you’re looking for a quick and easy way to create a design on your rock, vinyl decals can be a great option. Vinyl decals are available online.
8. Ink Transfer with Glue or Temporary Tattoo
The idea in the DIY tattoo is to transfer the ink from a printout into the rock. This happens by first letting the ink(on the paper) to stick to the rock with the help of white glue or mod podge. The paper is then gently removed, revealing the design(ink).
To do this, you will need to print out your design onto regular paper, then stick it(print facing down) to the rock. Allow the glue to dry completely. Wet the paper and gently rub it off leaving the printed ink on the rock.
You can also do this using temporary tattoo for convenience. This only works in smooth rocks.
9. Image Transfer on Rocks Using Mod Podge
This method also uses mod podge (or white glue), but here we transfer the whole image(with the paper) instead of just ink. Tracing paper is also used to trace the design first and then mod-podge into the rock for painting.
It can be done directly using print-out on a regular paper. However, it will not be a smooth because paper is thicker than tracing paper.
10. Making Outlines Out Of Straight Lines
This technique works particularly well for geometric designs or patterns that require straight lines. This can also help center the design before doing a freehand sketch, as you will see in the video below.
Since rocks are not flat, you might need something flexible like a cardboard or bendable ruler so it can follow the rock’s curve. Simply hold it against your rock, following its curve if needed, and then trace it using a pencil.
11. Using Tracing App for Rock Painting
Finally, if you can’t print out the designs you can do it digitally by using a tracing app on your phone or tablet.
There are a variety of free and paid tracing apps available like Trace Anything (for androids 5 and up) or Tracing Projector (for Iphone). They allow you to import your desired design and trace it directly on the rock.
This technique is particularly useful if you don’t have access to a printer or don’t have the materials needed to transfer the design. Although you will need a tripod or something steady to hold the phone/tablet as you draw on the paper.
BONUS. Freehand Sketching Technique
Can’t help but add this as a bonus. Personally, I love freehand sketching outlines for my paintings(including on rocks) which I talked about in the blog sketching before painting. However, I do understand that it might be challenging for beginners who haven’t yet developed their drawing skills.
This method involves drawing your design directly onto the rock with a pencil. Like painting rocks, with practice, drawing is a learnable skill. What I mostly love about it is it doesn’t require any setup or materials, just a pencil.
In the picture below, the butterfly sketch was done by freehand sketching using a white color pencil.

Final thoughts
I hope these 11 ways to outline your rock painting designs have inspired you to start creating your own rock art! Whether you prefer to use stencils, transfer paper, stamps, or wing it with freehand, there is a method that will work for you.
Remember, there is no right or wrong way to paint rocks, so have fun and let your creativity flow! With a little bit of practice, you’ll soon be creating beautiful designs on your rocks that will bring joy to yourself and others.


