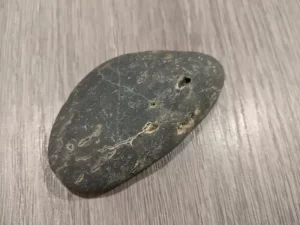
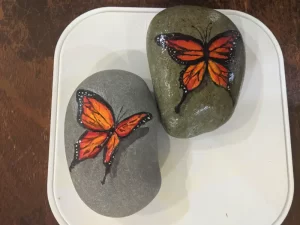
So you picked some smooth rocks and you’re excited to do some rock art painting. But before you start, you have to prepare your rocks. Here’s how.
Rocks or stones need to be scrubbed, washed thoroughly, completely dried, and primed before painting. These are necessary steps for the paint to adhere to the rocks. For smoother and more color contrast; the rocks can be filled with spackle, polished with sandpaper, and then primed with light-colored acrylic paint or primer.
There are few basic steps in preparing stones and rocks for painting. If you want to take your art to the next level, the additional steps I included below will make them smoother and look more vibrant.
~This blog contains affiliate links.
Steps in Preparing Rocks for Painting
What you will need:
- Medium size, smooth, flat stones or rocks
- Basin or tub
- Clean Water
- Rags / towels
- Brush, soap, and hot water (optional)
- Spackle / Wood Filler / Other filler (optional)
- Sand paper (optional)
- Primer paint and brush (optional)

1. Prepare the Towels for the Rocks (optional)
I find it easier to have towels or rags laid out beside the sink before I start washing the rocks. That way I can easily move the rocks out of the water after rinsing in step 2.
Wiping the rocks right after also prevents the rocks from soaking and absorbing more water during the wash, which could then prolong the drying time.
You can use old shirts or rags instead of towels for this step.
Note: You don’t need to do this step if you only have 1 or 2 stones to wash. You can just go straight to washing in step #2.

2. Clean the Rocks in a Basin with Soapy Water
Place your rocks in a basin with some dish soap and water. I recommend using a basin or tub instead of directly washing them in your sink since these rocks can leave scratches or dents. Swish and turn them around to clean. It’s also easier to do the swishing in a basin.
Use your brush, old toothbrush, or scouring pad to scrub the rocks if they have some stubborn dirt. Then proceed to step #3.
Notes:
If you buy them from the dollar or craft store, they are might be coated with paraffin wax or oil coating. They coat rocks with wax to make them shiny. If they have wax you will need to soak your rock in hot water with soap. Let the wax melt and float, rinse, and repeat until all wax is removed.
Do NOT boil the rocks. As I will further explain in step #5, overheating can make them explode.
I also don’t recommend using the dishwasher to clean your rocks. It might damage the dishwasher and sand or dirt may clog the drain. Just not worth the risk, in my opinion.

3. Rinse the Rocks Very Well.
Make sure you rinse all the soap and debris. Otherwise, the acrylic paint or any color material will not adhere very well.
After the rinsing, place them in your prepared towels.

4. Wipe the Rocks with a Rag or Paper Towel.
Removing as much water from the rocks will reduce the time you need to let them air dry.

5. Let the Rocks Dry Completely.
This is very important. The paint will not adhere very well if the rocks are wet or moist.
You can place them on a drying rack or tray if you have one. Find a warm dry spot in the house such as near the heater or by the window where the sun shines and let the rocks air dry.
Caution:
Don’t be tempted to place it in the oven to bake your rocks. Honestly, I thought this was a good hack at first. But then again, I did my homework and found out it is actually very risky.
Rocks can explode when heated. Yikes! This is because there could be some trapped air or water that will try to get out. You might have witnessed this when you do bonfires. Also, I can only imagine rocks will also be very hot after, if they didn’t explode at all, you might need more time to let them cool down, which defeats the purpose of having to wait less time.
6. Fill the Gaps or Holes in the Rocks (optional)
You can use fillers like spackle or wood filler to fill up significant gaps in your rocks. Or if you just want them to be super smooth. I personally haven’t done this since I usually have fairly smooth rocks.
I discussed how to smooth rocks in more details in another blog post.
7. Smooth the Rocks with sandpaper (optional).
If you decided to put fillers in your rock, you might need to smoothen them out with sandpaper to even out the surface. Again, I haven’t done this since I never fill mine.

8. Prime the Rocks.
Using your flat brush, apply 1 or 2 coats of acrylic or wall primer paint on your stones. You can do this on the entire rock by painting one side, let it dry, and repeat on the next side. Or you can just paint one side.
This one is an optional step too, but this one I sort of do. I usually paint the background before I put the details so it’s just like priming the parts I want to paint.
Some painters would want to prime to reduce the absorption of paint and make the acrylic paint adhere better, thus using less paint. You can save money if you use cheaper primer than the acrylic paint you will use for the actual painting, but not if you use the same acrylic paint for priming.
Priming creates more contrast to your painting since it’s usually dark color against a light background. If your actual design will be a lighter color, it might be better to keep the natural dark color of the rock as a background or prime it with dark color. It really depends on your preference.
Some painters pour the paint all over their rocks or dip them in paint to make them look very polished.
There you have it, folks. All the necessary and extra steps to prepare your rocks for painting. Now let’s get painting!


